Sunday, April 26, 2015

Ready, Set, Go: Traveling Art Supplies

Here is what I want to bring!
I need to made a new portfolio,
though. My old one, upper left,
is worn out. 
It's time to decide what I can realistically bring with me, and what I cannot. I want to bring my large, daily journal, but it's too big and heavy, so I pulled out the smaller one, shown in the picture at the bottom. Even that one is too thick, and takes up too much room. Instead, I am bringing my "circus" book to use as a daily journal, and for collage. It is an altered book my dear friend Lois gave me years ago, and I have traveled with it previously. Time to finish it. It is the perfect venue for journaling now, since I feel like a plate spinner in the circus!

Now, to make a new portfolio. How, you ask? Decide if you want a square or rectangular one, mark off the dimensions on a nice, thick stock or, as I used, watercolor paper, and grab a metal ruler and a bone folder.

On my hand-painted watercolor paper, I marked a 7" square, then, using a compass (you can use a large bowl, too!), I marked 3.5" scallops. Next, I added lines for an additional 1/4" outside of the 7" square. That gives the portfolio some thickness for holding the papers I will pack.

Mark the dimensions, trim and fold using a
metal ruler and a bone folder. I added a set
of double lines, 1/4" apart, for depth.
You can close this type of portfolio by just overlapping the scallops, but I decided to recycle the tabs and ribbons from my old portfolio and use those. Since I have a grommet tool and a ton of pretty, colored grommets, I pulled those out and picked a pretty blue color to match.
This tool punches and attaches a grommet all at once.
I don't even know where I got it, but have had it
forever. It is a handy-dandy tool!

Squeeze and attach the grommets. Insert knotted ribbons through my hand-painted tabs. Choose loose drawing papers and some collage scraps to put inside. I'm not on vacation; this is a serious, personal trip, and isn't about making art. I'm packing light compared to what I normally would bring.

Hurrah, they all fit!

All set! My selected art supplies and new portfolio of papers all fit in this nifty bag my friend Gail gave to me. That, in turn, will take up little space in my luggage. Sometimes being limited in what you have to use forces creative responses. I'm counting on it!


Sunday, April 19, 2015

Planes, Trains and Automobiles: Artist Travels

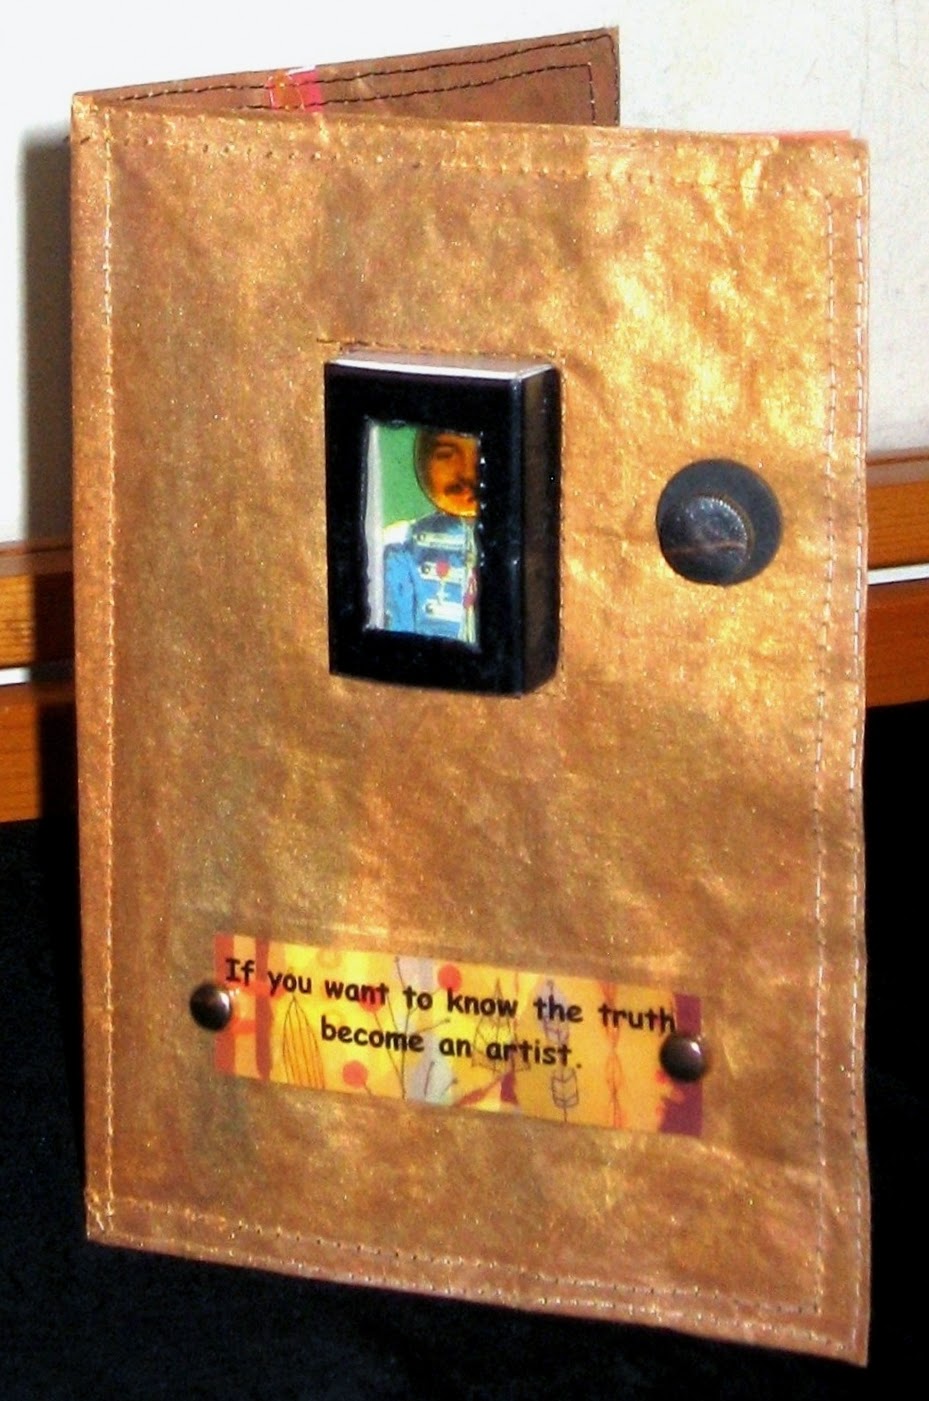
Don't forget your journal! This is
one of my refillable matchbox 
journals, made entirely of recycled
materials.
As I prepare to be on the road, I am reminded of one of the workshops I teach called Planes, Trains and Automobiles: Techniques for Traveling Collages. When you are traveling, you cannot possibly bring all of your art supplies with you. I have perfected a little traveling kit that I like to use, and have found over the decades, that both the familiarity of what I pack combined with the limitations of what I am able to pack combine for some fun inspiration. If you only bring one thing, though, make sure you bring a journal / sketchbook!

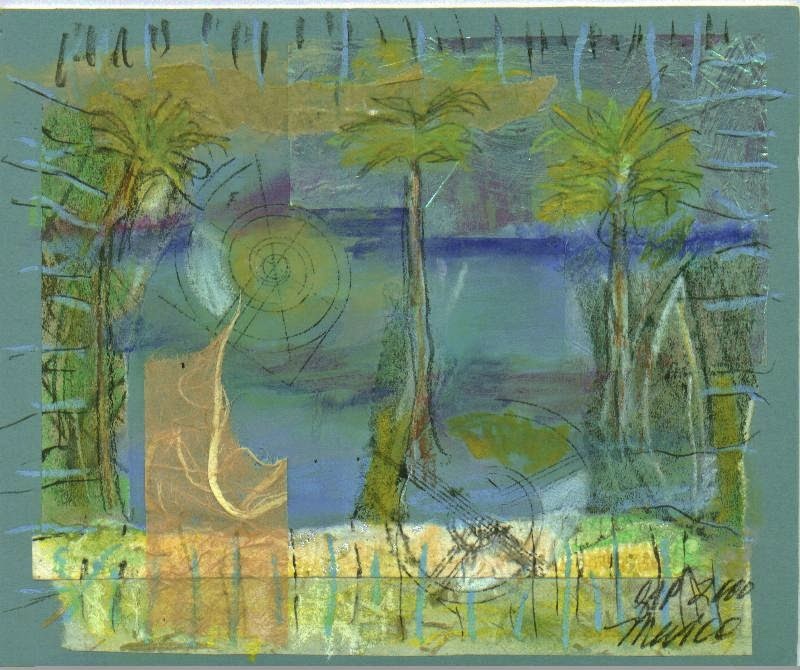
I made this collage while sitting at the beach.


With just a few supplies, you can observe and respond to your environment through your artwork, and have a special record of your travels at the same time!

So, what to bring? Do: Grab a journal that is a convenient size. Drill, hole-punch, stitch, pre-paint or fold pocket pages into some of the pages. Don't: try to bring large or heavy tools. Do: Make a checklist of what you are packing. This will make it easier next time. Don't: bring any potential "weapons" on the plane, if you are flying. Pack scissors, needles or anything else like that in your checked luggage. Do: Use the zipper pouch in your suitcase for art supplies.

In my workshop, I show students how to make a petal-fold portfolio in any size to hold their art papers. Any little travel bag will work, however. You can add a place to hold pencils, pens, brushes and markers by stitching or super-gluing rubber bands, hair elastics or sewing elastic. If you use buttonhole elastic, you can fill all those little holes with different tools and supplies.

I will take some pictures as I pack my materials to show you what I bring along. If I can, I always bring a strip of self-adhesive photo corners, a few brass brads, some folded waxed paper, small scraps of matboard, a small container of Yes! glue, a few brushes, pencils and pens, a tin of watercolor crayons or pencils, a tin of oil pastels, a sewing needle, including one I can use to poke holes, colored embroidery floss, some Tear Away, a bone folder, a glue stick, a pair of small paper scissors, 1 small container of white paint, 2 mini-spray bottles, one for water and one for rubbing alcohol, a xylene colorless blender with a small metal spoon, some black and white photocopies for transfer, some throw-away pictures and, finally, a few small strips of fine grade sandpaper. It all fits in a tiny little bag, and fits, next to my portfolio of collage papers, right into my zipper pouch of checked baggage. I am good to go!

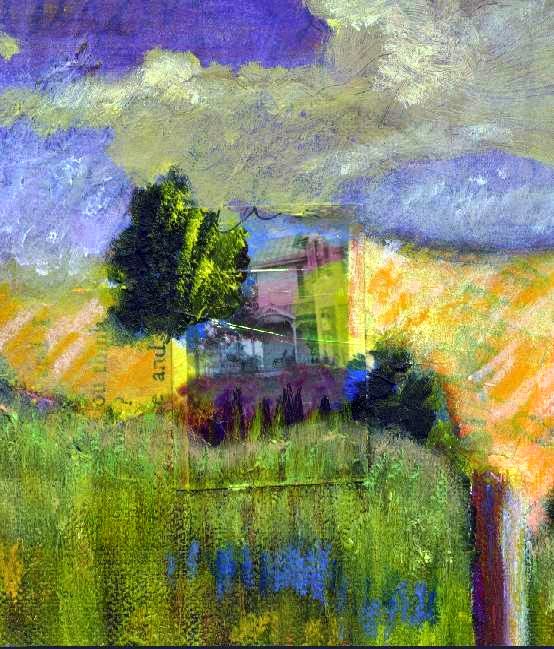
I applied oil pastels over part of an old painting on
canvas board that I had cut up to bring along on a trip. I
made my collage right on top while I was out on the road.


Friday, April 10, 2015

And Another Thing

This is an acrylic medium transfer
onto painted canvas of an old black
and white photograph.
I have been diligently cleaning both my office and my studio (yes, I am lucky to have two separate rooms!) As I sort files and fabrics, I am focused on what type of work I want to concentrate on as I go forward. By framing my sorting that way, I am able to acknowledge, for example, a techniques book that I have loved and re-read numerous times over the years, but that, realistically, is not something I plan to work with moving forward.

It is empowering to focus my energies and claim the many unfinished pieces and exciting work I plan to create, while also letting go of pieces I will never finish (they sometimes get upcycled into another form), and passing along books or fabric to someone else who is passionate to use them right now!
The throw-away remainder of a Polaroid transfer

In sorting through my stack of Polaroid transfers that I was preparing with mats to list on etsy, I found the image at left, me in France many moons ago. This print is what remains on the Polaroid film after the image has been transferred to another surface. Much of the color is gone, often leaving a faded looking and intriguing after image. I mention it because, in my last post, I was showing you how I alter old photographs by scratching them up and adding color back to the surface.

This image has been altered by scratching with a sharp, thin awl, which you can see best if you look at the edge around the right-hand shoulder and head area. The background was altered using a Q-tip dipped in bleach, spread over the area to be changed, then rinsed off. Bleach can be used with a spray bottle, as well, or in the form of a bleach gel as found in many cleaning products. Just make sure you have good ventilation, gloves and an area that is easy to wipe down. Better yet, do it outside when the weather is nice!

To complete the image for use in collage, I peel away the thick paper backing from photographs. By removing the extra paper, the photograph becomes more pliable, like a piece of fabric. It is easier to keep flat if you are using glue to adhere it, fun to machine stitch in place onto another surface, and thin enough not to make your fingers bleed if you are hand stitching it down.

Now, go immediately to your studio and play! Can't wait to hear what you've done with these ideas. I'll be in touch when I find more altered images in my cleaning.