Showing posts with label upcycled clothes. Show all posts

Thursday, September 29, 2011

Upcycling with Paint: New Fabric

As I mentioned in my last post, I was experimenting with various paints from my stash to re-do some fabric that was slightly faded.
The fabric is a stretch cotton, so it took the paint a bit differently than, say, silk or plain cotton.

Since I want to use the remaining skirt and spaghetti strap ties that I cut off this dress, I upcycled the fabric with a watercolor effect. I dampened the fabric in my washer, then placed one of my painting boards underneath the circle of the skirt. Then, I simply painted away, adding my Jacquard Dyna-Flow blue paint directly from the jar to the black areas, which darkened them up nicely, and wetting my brush a bit to spread the paint in the formerly white areas.  I love how it came out, and can't wait to create an upcycled piece with it!

A final note: Mary Helen, I have been trying for days to leave a reply to your comment, and have been unsuccessful. Blogger must be having some issues if I can't even comment on my own blog! Anyway, thanks for taking the time to have a look.

Sunday, September 25, 2011

Discharge and Painting Experiments


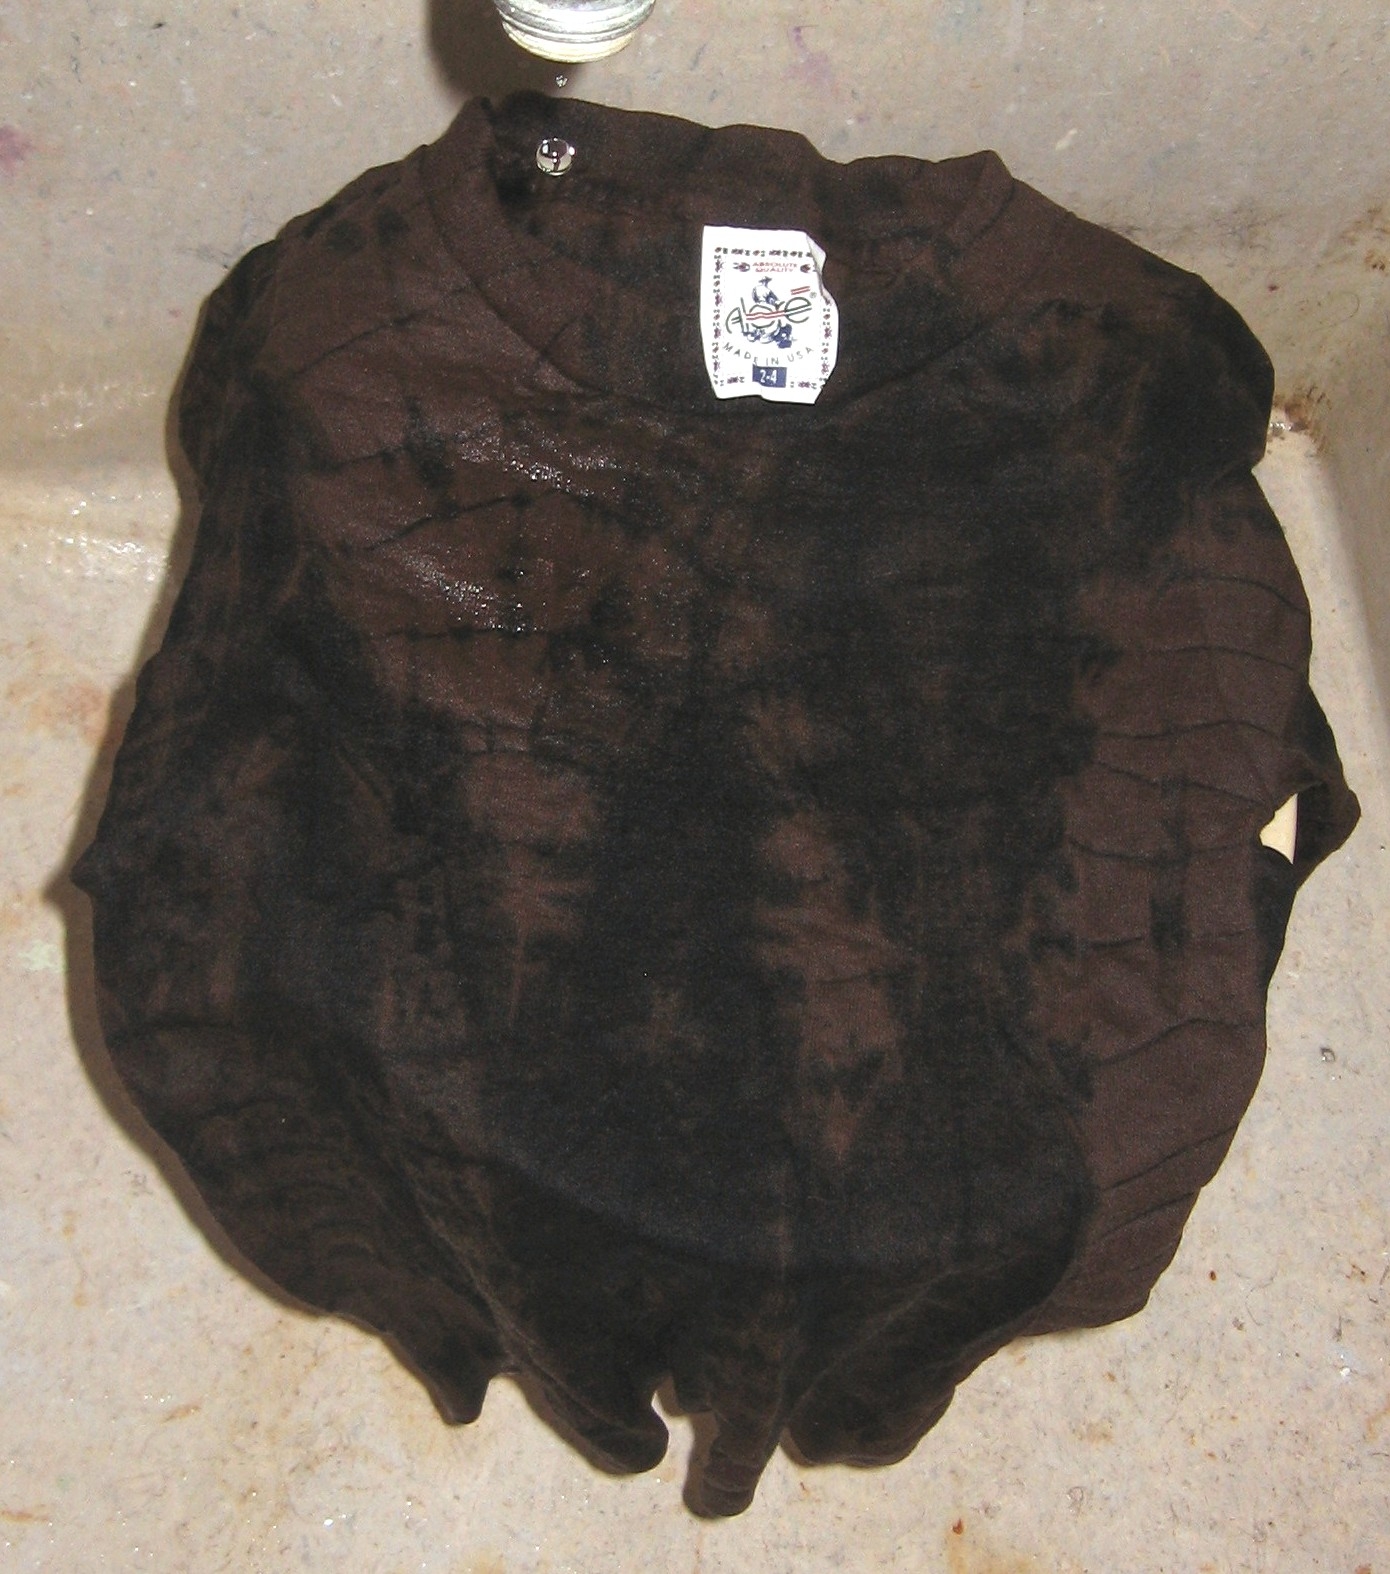
Discharge complete, here is the wet shirt.
Earlier this week, I posted a picture of a t-shirt tied and ready for discharge. I mentioned in one of my comments on that post how fun it is to discharge fabric and purchased shirts, because you never know that color they will become once the discharge is complete.

In the photo to the left, you can see the shirt that has been discharged, soaked in vinegar and untied, still wet, sitting on my bucket in the utility sink.

I immediately washed the shirt, then dried it. Here's how it came out. The navy blue design is where my tied string left the original color. The rest of the discharged shirt turned a lovely shade of brown. Love it!

I have posted two pix here of a turquoise t-shirt I had previously discharged, but using only a bleach pen. You can immediately see the difference. In the turquoise shirt, more of the original color remains. That's because I was able to apply the discharge with a bleach pen only on the tied areas of the shirt. Because the shirt was not soaked in discharge solution, only the area where the bleach was applied was discharged.

The navy shirt I began with turned a lovely shade of brown.


Finally, I have added a picture of today's experiment: fabric paint. I received a package this week, a box of items sent to me to use in my Magic Baby Designs upcycled line. This cute black and white dress was in the box, but is a bit too faded to use as is. The stretch cotton fabric is in still in good condition, however, without pilling or damage other than fading, so I decided to paint it. I did the test on the upper bodice area, which I will not be reusing. I could, of course, overdye the entire garment, but as I said previously, I don't typically have a lot of dyes on hand. I do, however, have a large supply of various types of paints.


The reds and pinks you see on the left are several types of airbrush inks. Although I like how they look on the white portions, I did not, however, like how the paints looked on the black areas, which is where the problem was, after all. I needed something that would cover the black, darken it, and add color to the white. On the left, you see three different blues painted on. The two on the farthest left were also two different types of airbrush ink, one opaque, and one not. Again, they affected the black areas in an undesirable way. The deeper blue on the far right worked perfectly. I used an azure blue Jacquard Dyna-Flow paint, and it did the trick. I painted it onto dry fabric, but will evenly wet the fabric in the washer, spin it, and paint it damp when I finish the painting. I'll let you know how it turns out!

Sunday, September 26, 2010

Inspired by my own Magic Babies

It's been a busy fall so far. Here is a quick post showing you what I have been up to the past few weeks.

Here is one of my Magic Baby muses with her daddy's guitar. She is wearing her fruity flower dress, one of my early prototypes. Since the knot shoulder closure proved to be difficult in dressing her, I have redesigned the shoulder closure. Still, she looks adorable, don't you think?

According to their mothers, all of my Magic Babies are growing like weeds, and need new clothes. I have gone back to my upcycling ways from thirty years ago, when I was a young mother and had to refashion existing clothes for my children. Here are a few examples that I made for the new crop of babies in the family.

This is a cute swing top with matching pants. I upcycled a sweatshirt for the top, then added some applique and a knit contrast edge. Can't wait to see her wearing it. For the pants, I had some matching stretch baby wale corduroy. Perfect!

For this next three piece outfit, I used part of a stash of clothing my sister recently gave to me. This was made from a sweater skirt and top that had been my mothers over two decades ago. I paired it with a paisley challis, made matching buttons, added some lace, and voila!

The challis was tricky to work with on top of the knit, but I just moved slowly, and it worked. I used the existing sweater neck edge, but sewed it on separately. The challis band extends around the back into cute ties. I talked my husband into filming a tutorial while I made the matching buttons. I'll post a link to that later.

The matching sweater skirt has a soft waistband and a challis and lace edge.  I added a pleated skirt from the lightweight challis, which hangs underneath the knit.
For my other little Magic Baby girl, I took an existing onesie and added a double ruffled skirt with the pre-made sheer trim. Then, from the remnants of a purchased fleece blanket, I couldn't resist whipping up the polka dot jumper!


There are many more to show you, but that is enough for now. I will finish with two new designs, not made from something else. The first is a layered skirt made from sheers and tulle. My daughter calls it the "Prom Dress." The last is a custom order I just finished. It is a size 8, and is a version of my Little Frenchy design for toddlers. I call the bigger size the Frenchy Girl.


I just finished a new coat design made with polka dots for winter. I call it the Twirl Coat. More to come!